The Real Cost of Data: Bangkok Edition
Let's get straight to it: on my last 8-day trip to Bangkok, I spent a grand total of €280 on *everything*. That's hostels, street food, tuk-tuks, massages, a couple of Changs, and yes, data. My data budget? A mere €12. If I'd stuck with my usual European roaming plan, that would have easily jumped to €50+. That's a whole extra night at a decent hostel like the Lub d Bangkok Siam Square or a solid week of street food dinners. This isn't about luxury travel, it's about making every satang count.
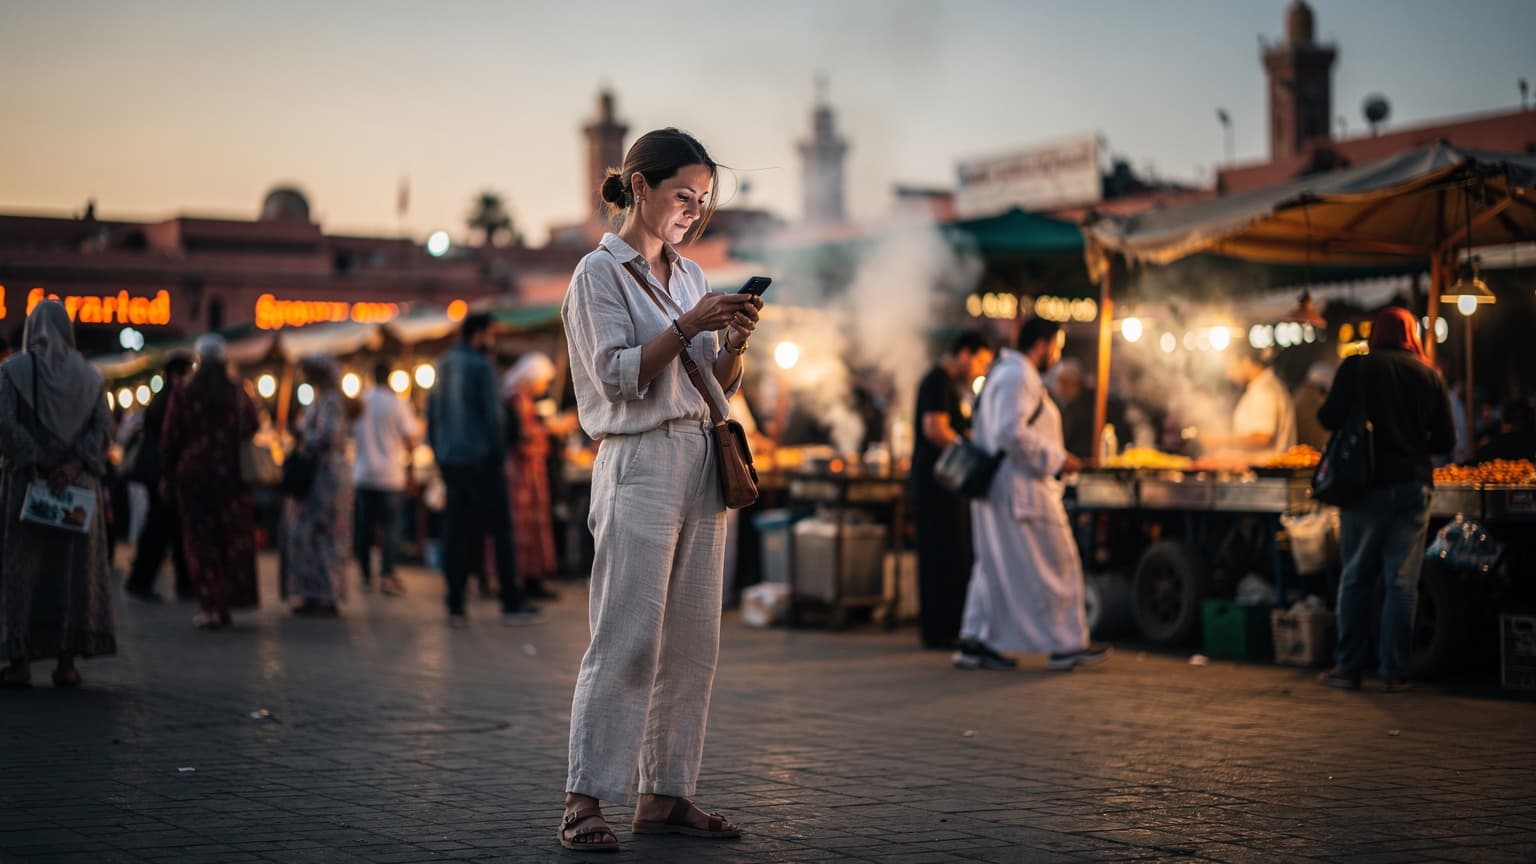
Bangkok is a city that demands connectivity. From navigating the labyrinthine alleys of Chatuchak Weekend Market to booking a Grab bike during rush hour, or simply staying in touch with the folks back home, you need reliable internet. But what's the cheapest way to get it without getting ripped off? We'll break down the options, starting with the ones that'll empty your wallet fastest.
The Hidden Fees of Unplanned Connectivity
Ever landed in a new country, exhausted, and just bought the first SIM card you saw at the airport? Been there, done that. Most airport vendors know you're desperate. They'll push overpriced 'tourist SIMs' with more data than you'll ever need, and often, less transparent pricing. It's not a scam, exactly, but it's rarely the best deal.
Think about it: that extra €5-10 you spend on an airport SIM could buy you two delicious bowls of Boat Noodles at Victory Monument, or a ride on the BTS Skytrain across half the city. Every euro counts when you're trying to hit that €40/day budget.
Why Your Home Carrier is Ripping You Off: Roaming Nightmares
This is the biggest money pit for any backpacker. Seriously, don't even think about it. I once forgot to turn off data roaming crossing the border from Laos into Thailand, and two hours later, I had a €40 bill waiting for me. For doing nothing! My phone barely registered a signal. It was a painful lesson.
| Carrier Type | Typical Cost (per GB) | Hidden Fees | Convenience Factor |
|---|---|---|---|
| Home Carrier Roaming | €10-20+ | Daily passes, activation fees, data overage | High (no setup, but high stress over cost) |
| CheapESIM eSIM | €2-5 | None | High (pre-activated, instant) |
| Local Physical SIM | €1.50-4 | Activation, registration, potential language barrier | Medium (requires in-person purchase) |
Most international roaming plans from European or North American carriers charge exorbitant rates. You might get an 'international day pass' for €10-15, but that's a daily charge whether you use 100MB or 1GB. Over a 10-day trip, that's €100-150 just for data. That's a round-trip bus ticket from Bangkok to Chiang Mai on the Sombat Tour VIP bus, or a week's worth of delicious street food on Khao San Road. No thanks.
"The moment I land, my phone goes into airplane mode until I've got my local data sorted. No exceptions. That one time I forgot was enough to teach me."
The Cost of Ignorance: A Tale of a €150 Data Bill
I met a guy in a hostel in Bangkok, let's call him Mark, who was complaining about his data bill. He'd used his T-Mobile plan for a week, thinking the 'unlimited international roaming' meant unlimited high-speed. Nope. After 500MB, it throttled to 2G speeds, making Google Maps useless, and any calls dropped constantly. The kicker? His bill had a surprise €150 charge for exceeding some fine-print threshold. It turns out, that 'unlimited' was really 'unlimited slow data with a hidden premium for speed'. Always read the fine print, folks.
Local SIMs: The Traditional Backpacker Fallback
For years, this was my go-to. Land, find a 7-Eleven or a carrier store, buy a local SIM. In Bangkok, the big three are AIS, DTAC, and TrueMove H. They all offer decent coverage and speeds, especially in urban areas. A typical 30-day SIM with 15-30GB of data would set you back around 400-600 THB (€10-15). This is the cheapest physical option, hands down.

The Hassle Factor: Queues, Forms, and Language Barriers
While cheap, getting a local SIM isn't always smooth sailing. Here's why:
- Airport Lines: At Suvarnabhumi (BKK) or Don Mueang (DMK), the SIM card kiosks often have long queues, especially if you land during peak tourist times. After a long-haul flight, the last thing you want is to wait 30 minutes.
- Registration: You'll need your passport. They'll scan it, take a photo, and fill out forms. Sometimes it's quick, sometimes it's a bureaucratic nightmare.
- Language: While most airport staff speak some English, venture into a smaller local shop, and you might struggle to understand the nuances of a data plan. Have you ever tried explaining 'hotspot capabilities' in basic Thai? Not fun.
- Physical Swap: You have to take out your home SIM, store it safely (don't lose it!), and insert the new one. If your phone is locked to your home carrier, you're out of luck entirely.
For me, the time saved by having an eSIM already active is worth the slight price difference. Time is money, especially when you're on a tight schedule exploring temples or catching a connecting bus to Pattaya.
The Best Local SIMs (If You Must)
If you absolutely prefer a physical SIM, head for a dedicated AIS or TrueMove H store outside the airport, perhaps in a mall like MBK Center or Terminal 21. You'll get better deals and more informed staff. Look for their 'Tourist SIM' packages, but always ask for the 'unlimited' data (often throttled after a certain threshold) or a high-GB package. A 15GB, 30-day plan from AIS for around 400 THB is usually a safe bet.
Introducing the CheapESIM eSIM: Your Wallet's Best Friend
This is where CheapESIM steps in to save your baht and your sanity. An eSIM is a digital SIM card, embedded directly into your phone. No physical swapping, no queues, no language barriers. You buy it online, scan a QR code, and you're connected. Simple as that.

For Bangkok, CheapESIM offers competitive packages that often cost less than local SIMs, especially when you factor in the time and hassle saved. For example, a CheapESIM plan for Thailand might offer 10GB for 15 days at around €12-15. Compare that to the €10-15 for a local SIM (with the airport hassle) or €100+ for roaming. The choice is clear.
You can browse all Thailand eSIM plans directly on the CheapESIM website and activate before you even leave home. This means landing in Bangkok, stepping off the plane, and having immediate access to Google Maps, Grab, and your WhatsApp messages. Pure bliss for a budget traveler.
CheapESIM vs. Local SIM: A Direct Cost Comparison
| Feature | CheapESIM eSIM (Thailand) | Local Physical SIM (AIS/TrueMove H) | Home Carrier Roaming |
|---|---|---|---|
| Cost (10GB / 15 Days) | €12-15 | €10-15 (plus airport queue time) | €100-150+ |
| Activation | Instant QR scan, pre-trip | In-person, passport required | Automatic |
| Convenience | Highest, no physical swap | Medium, requires effort | Low (due to cost/speed issues) |
| Phone Lock Compatibility | Works on unlocked phones | Works on unlocked phones | Works on any phone |
| Multiple Numbers | Keep home number active | Lose home number access | Keep home number active |
As you can see, the value proposition for CheapESIM is strong. The slight price difference (if any) is easily offset by the sheer convenience and lack of stress.
The Math: GB per Day, and Why It Matters
Before you buy any data plan, you need to know your usage. This isn't just about saving money, it's about not running out of data when you're trying to find your hostel in a new neighborhood at 2 AM.
- Light User (0.5-1GB/day): You mainly use data for maps, WhatsApp messages, checking emails, and light social media scrolling.
- Moderate User (1-2GB/day): You're streaming some music, uploading photos, making occasional video calls, and relying heavily on navigation.
- Heavy User (2-4GB+/day): You're a digital nomad working on the go, constantly streaming video, participating in Zoom calls from a cafe in Thonglor, or tethering other devices.
For a typical 10-day Bangkok backpacking trip, a moderate user would need around 15-20GB. Let's say you average 1.5GB per day. 1.5GB/day × 10 days = 15GB total. A CheapESIM plan offering 15GB for 15 days for €18-20 is a solid choice. That's just €1.20-1.33 per GB, far cheaper than roaming.
Tracking Your Data Usage Like a Pro
Most modern smartphones have built-in data usage trackers. Reset it before your trip starts, and check it daily. This will give you a real-time understanding of how much data you're actually consuming. If you're consistently under your daily average, you know you can afford to stream that extra episode on Netflix. If you're burning through it, maybe save the heavy uploads for when you're on hostel Wi-Fi.
Getting Your CheapESIM eSIM Activated: A Step-by-Step Guide
This is the easy part, and you can do it from your couch before you even pack your bags. It literally takes about 2 minutes.
- Choose Your Plan: Visit the CheapESIM website and select a Thailand eSIM plan that matches your expected data needs and trip duration. Pay securely online.
- Receive QR Code: You'll immediately receive an email with your eSIM's QR code and installation instructions.
- Scan and Install: On your iPhone (or Android), go to Settings > Cellular (or Mobile Data) > Add eSIM. Scan the QR code. Follow the prompts. Name your new eSIM something clear, like 'Thailand CheapESIM'.
- Configure Settings: Once installed, set your CheapESIM eSIM as your primary data line. Keep your home SIM active for calls/texts, but ensure data roaming is OFF for your home line.
- Activate on Arrival: Your eSIM will automatically connect to a local network when you land in Bangkok. No fumbling, no stress.

Troubleshooting Common eSIM Issues
Occasionally, you might hit a snag. Don't panic. Most issues are minor:
- "No Service": Check your phone's APN settings (often automatically configured, but sometimes needs a manual tweak, details usually in the CheapESIM activation email). Also, ensure data roaming is enabled for your eSIM profile (yes, for the eSIM, it's different).
- Slow Speeds: This could be network congestion, or you might be in an area with poor coverage. Try restarting your phone. If it persists, check the CheapESIM app or website for network status updates.
- Activation Failed: Double-check you scanned the correct QR code. If still an issue, contact CheapESIM support, they're usually very responsive. You can find answers to many common questions on the CheapESIM FAQ page.
Border-Crossing Hacks and eSIM Flexibility
This is where eSIMs truly shine for the multi-country backpacker. If your Bangkok trip is part of a larger Southeast Asia adventure, an eSIM can save you a ton of hassle at border crossings.
Imagine this: you've taken the overnight bus from Siem Reap, Cambodia, to Aranyaprathet, Thailand. You clear immigration at Poipet/Aranyaprathet, and boom, you're in Thailand. If you had a Cambodian SIM, it's now useless. With an eSIM, you simply switch your active data line to your pre-installed Thailand CheapESIM profile, and you're good to go. No need to hunt for a SIM vendor at the border town, where prices are usually inflated and options limited (believe me, I've seen it). This kind of flexibility is a lifesaver, especially if you're like me and often find yourself on night buses or crossing less-frequented land borders.

Multi-Country eSIMs: The Ultimate Flexibility
If you're planning to hop from Thailand to, say, Malaysia or Vietnam, CheapESIM also offers regional eSIMs. These cover multiple countries, meaning you don't even need to buy a new eSIM for each border. One purchase, seamless connectivity across a whole region. This is particularly useful for backpackers doing the classic Southeast Asia loop. The convenience alone is worth the investment, let alone the potential savings over buying individual local SIMs in each country.
Thinking of heading to Europe next? CheapESIM has you covered there too. For instance, if you're planning a Mediterranean adventure after Asia, you could grab a regional eSIM for seamless data from Italy to Greece.
Real-World Scenarios: When an eSIM Saves Your Skin
I've been in enough sticky situations on the road to appreciate reliable data. Here are a few times an eSIM has literally saved my travel day:
- The Lost Hostel: Arrived at DMK airport at 1 AM, after a delayed flight. My pre-booked hostel, 'The Yard Hostel Bangkok', was tucked away down a tiny soi in Ari. Without immediate data for Google Maps and to call the hostel, I would have been wandering aimlessly, possibly paying for an overpriced taxi. My CheapESIM kicked in the second I landed, guiding me straight there.
- Scam Alert: Got into a tuk-tuk near Wat Arun, and the driver immediately tried to take me to a 'special' tailor shop instead of my requested destination. I quickly pulled up Google Maps, showed him the direct route, and pointed out his deviation. He knew I was connected and couldn't be easily fooled. Having data acts as a powerful deterrent against common tourist scams.
- Emergency Booking: My planned overnight train to Chiang Mai was suddenly cancelled due to track maintenance (classic!). I needed to book a last-minute bus ticket and a new hostel for the night. All done on my phone, on the go, thanks to uninterrupted data.
Data-Saving Tips for the Frugal Traveler
Even with a cheap eSIM, smart data management keeps more money in your pocket.
- Download Offline Maps: Before you leave your hostel with Wi-Fi, download offline maps for Bangkok on Google Maps. This saves a huge amount of data when navigating.
- Use Wi-Fi Whenever Possible: Hostels, cafes, malls, and even some public transport in Bangkok offer free Wi-Fi. Always connect when available for heavy tasks like video streaming or large uploads.
- Restrict Background App Refresh: Go into your phone settings and turn off background refresh for apps that aren't critical. Apps like Instagram and Facebook can eat data even when you're not actively using them.
- Turn Off Auto-Downloads: Ensure apps aren't set to auto-download updates or media over cellular data. This is a common culprit for unexpected data consumption.
- Compress Data: Some browsers (like Chrome's data saver mode) and apps can compress data, reducing your overall usage.
My Personal Data Usage Breakdown on the Road
Based on extensive testing across countless trips (including my Bangkok stint), here's what I typically see:
- Google Maps: 200-300MB/day (heavy navigation)
- WhatsApp/Messaging: 50-100MB/day (text, some photos)
- Social Media (Instagram/TikTok): 300-500MB/day (moderate scrolling, some uploads)
- Email/Browsing: 100-200MB/day
- Light Streaming (music/podcast): 100-200MB/hour
Total for a moderate day: 1-1.5GB. Knowing these numbers helps you pick the right CheapESIM plan for your style.
Final Verdict: Bangkok Data Done Right
For any backpacker heading to Bangkok in 2026, a CheapESIM eSIM is the smartest, most budget-friendly choice. It eliminates airport queues, avoids predatory roaming fees, and gives you instant connectivity the moment you land. While a local physical SIM is a decent fallback if you're truly penny-pinching and don't mind the hassle, the convenience and peace of mind an eSIM offers are invaluable. You're looking at saving upwards of $30 on data alone, money that's much better spent on experiencing the incredible food and culture of Thailand's vibrant capital.
Don't let data worries eat into your budget or your precious travel time. Get your CheapESIM eSIM sorted before you fly, and focus on what really matters: exploring Bangkok without a hitch.
Frequently Asked Questions
How much data do I really need for a 10-day trip to Bangkok?
For a typical backpacker who uses maps, social media, and messaging daily, 15-20GB for a 10-day trip is a good estimate. This allows for moderate usage without constant worry. If you plan to stream a lot or work remotely, consider a 25-30GB plan.
Is my phone compatible with an eSIM for Bangkok?
Most modern smartphones released in the last few years are eSIM compatible, especially iPhones (XS, XR and newer) and recent Android flagships. Always check your specific phone model's specifications on the CheapESIM website before purchasing to ensure compatibility.
Can I keep my home phone number active while using a CheapESIM eSIM in Bangkok?
Yes, absolutely. One of the major advantages of an eSIM is that you can keep your primary physical SIM card active for calls and texts from your home number, while using the eSIM solely for mobile data in Bangkok. Just ensure you set the eSIM as your default for cellular data.
What happens if I run out of data on my CheapESIM eSIM in Bangkok?
If you deplete your data allowance, you can easily top up your CheapESIM eSIM directly through the CheapESIM app or website. You'll typically receive a notification when your data is running low, giving you time to purchase more without interruption.
Are the speeds of CheapESIM eSIMs comparable to local Thai SIM cards?
Yes, CheapESIM eSIMs use the networks of major local carriers like AIS, DTAC, or TrueMove H, meaning you'll get access to the same 4G LTE and 5G speeds and coverage as a local physical SIM card. Performance will be identical to what locals experience.
Can I use my CheapESIM eSIM to make local calls in Bangkok?
CheapESIM eSIM plans are primarily data-only. While you can use data-based calling apps like WhatsApp, Line, or Messenger for voice and video calls, they generally do not come with a local Thai phone number for traditional cellular calls. Keep your home SIM active for receiving calls if necessary.